
1. Install Adobe Reader or Foxit Reader
To open the digital papers and type in answers on a Windows device you need a free PDF reader such as:
When you install Adobe Reader
you may be asked if you want it to update itself automatically: say NO - you don't want it updating in the middle of an exam!
2. Adobe Reader - set up the toolbar
 It's important to make sure the 'Select Tool'
  and the 'Hand Tool'
  are displayed on the top toolbar.
If you can't see them then...
- In Adobe Reader DC:
- Select 'View' from the file menu
- Select 'Show/Hide' then 'Page Controls'
- Select 'Show Page Controls'.
- In Adobe Reader XI and below:
- Open Adobe Reader.
- if you see a 'How To' window on the right side of the screen, uncheck the 'Show How To Window at Startup' to turn this off.
- Right-click on the grey toolbar at the top of the screen and select 'Reset Toolbars'.
- Right-click again on the grey toolbar and in 'Select & Zoom', choose 'the Select Tool' and then the 'Hand Tool'.
3. Set up the reading options
Click on 'Edit' and then 'Preferences' and click on 'Reading'.
Then, under each of these sections:
- Screen Reader Options
- In 'Pages vs Documents', choose to 'Only read the currently visible pages'.
- Reading Order Options
- Set the Reading Order to 'Infer reading order from document (recommended)'.
- Read Out Loud Options (the built-in Adobe text reader)
- Untick 'Use default voice' and choose a voice from the menu.
- Untick 'Use default speech attributes' and choose the pitch and speed you prefer for the voice.
4. View settings
In Adobe Reader:
- Click on Edit > Preferences > Documents. Tick Restore last view settings when reopening documents and Remember current state of Tool Pane. Then click the arrow next to the right hand tools pane to close it so you can see more of the paper.
- You may want to choose View > Display Theme > Dark Grey which gives better contrast.
In Adobe Reader XI and earlier:
- If you see a How To window on the right side of the screen, uncheck the Show How To Window at Startup to turn this off.
Smooth Text
This option improves the clarity of the text displayed on screen.
- Click on 'Edit' and then 'Preferences' and click on 'Page Display' (top of the list).
- Under 'Rendering', set 'Smooth Text' to be 'For Monitor' (old CRT monitor) or 'For laptop/LCD screens' (for laptops and almost all modern flat screen monitors)
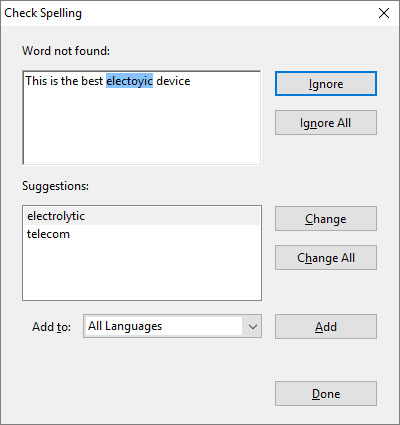 5. Spellchecker
On the day, SQA supply two versions of each digital paper:
- one with spellcheck enabled,
- and one with spellcheck disabled.
The different files are identified with 'SpellCheck' on or 'SpellCheck off' in the file name.
Before using the spellchecker, set the options and dictionaries.
Click on 'Edit' and then 'Preferences' and click on 'Spelling'.
Then, under each of these sections:
- Spelling
- Tick'Check spelling while typing'.
- Choose an alternate 'Underline colour' if you wish, particularly if you have altered the Adobe Reader page and text colours.
- Choose the correct spelling dictionary.
- Dictionaries for Spell Check
- Select the 'English (United States)' dictionary and press the 'Remove' button.
- Click on 'Add...'.
- Tick the 'English (United Kingdom)' dictionary and click 'OK'.
- Note you can download dictionaries in different languages from Adobe.
6. Set up auto-save
- Click on 'Edit' and then 'Preferences' and click on 'Documents'.
- Under 'Save Settings', tick 'Automatically save document changes to temporary file every:' and then type in the time you want to have between saves. The default is to save every 5 minutes.
7. Testing
Before letting any student use the system it is vital that you are familiar with its operation.
Test the paper before the student starts! Work on a copy of the paper.
Make sure you don't insert any answers into the one you are going to give to the students!


